|
|
| Line 1: |
Line 1: |
| | | | |
| | <center> | | <center> |
| − | ==Introduction== | + | ==Introduction: Summary of measuring devices, back up and safety equipment, and camcorder (+accessories)== |
| | {{Gallery | | {{Gallery |
| | |width=360 | | |width=360 |
| Line 25: |
Line 25: |
| | |Let's Build the S.H.O. Drive! - Slide 017 of 176.png||'''Wide Angle Lens Kit'''<br>''(Recording)''<br>• In order to capture a wider angle of view in the video, I purchased a Wide Angle Lens Kit from ButterflyPhoto via Amazon.com<br>• The included .43x Wide Angle Lens provides a better approximation of human vision. | | |Let's Build the S.H.O. Drive! - Slide 017 of 176.png||'''Wide Angle Lens Kit'''<br>''(Recording)''<br>• In order to capture a wider angle of view in the video, I purchased a Wide Angle Lens Kit from ButterflyPhoto via Amazon.com<br>• The included .43x Wide Angle Lens provides a better approximation of human vision. |
| | }} | | }} |
| | + | [[#toctitle|Click here if you need to jump back to the table of contents!]] |
| | <div style="clear:both"></div> | | <div style="clear:both"></div> |
| − | ==Phase 1== | + | ==Phase 1: Holes, brass hinges, square nuts== |
| | {{Gallery | | {{Gallery |
| | |width=360 | | |width=360 |
| Line 59: |
Line 60: |
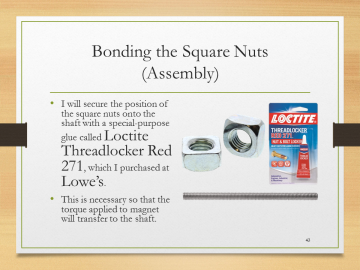
| | |Let's Build the S.H.O. Drive! - Slide 043 of 176.png||'''Bonding the Square Nuts'''<br>''(Assembly)''<br>• I will secure the position of the square nuts onto the shaft with a special-purpose glue called Loctite Threadlocker Red 271, which I purchased at Lowe’s.<br>• This is necessary so that the torque applied to magnet will transfer to the shaft. | | |Let's Build the S.H.O. Drive! - Slide 043 of 176.png||'''Bonding the Square Nuts'''<br>''(Assembly)''<br>• I will secure the position of the square nuts onto the shaft with a special-purpose glue called Loctite Threadlocker Red 271, which I purchased at Lowe’s.<br>• This is necessary so that the torque applied to magnet will transfer to the shaft. |
| | }} | | }} |
| | + | [[#toctitle|Click here if you need to jump back to the table of contents!]] |
| | <div style="clear:both"></div> | | <div style="clear:both"></div> |
| − | ==Phase 2== | + | ==Phase 2: Neodymium magnets and bearings== |
| | {{Gallery | | {{Gallery |
| | |width=360 | | |width=360 |
| Line 77: |
Line 79: |
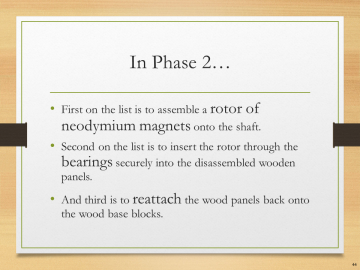
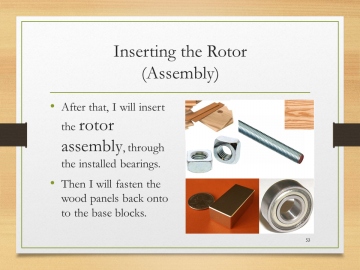
| | |Let's Build the S.H.O. Drive! - Slide 053 of 176.png||'''Inserting the Rotor'''<br>''(Assembly)''<br>• After that, I will insert the rotor assembly, through the installed bearings.<br>• Then I will fasten the wood panels back onto to the base blocks. | | |Let's Build the S.H.O. Drive! - Slide 053 of 176.png||'''Inserting the Rotor'''<br>''(Assembly)''<br>• After that, I will insert the rotor assembly, through the installed bearings.<br>• Then I will fasten the wood panels back onto to the base blocks. |
| | }} | | }} |
| | + | [[#toctitle|Click here if you need to jump back to the table of contents!]] |
| | <div style="clear:both"></div> | | <div style="clear:both"></div> |
| | | | |
| − | ==Phase 3== | + | ==Phase 3: Spool, coils, and ceiling hooks== |
| | {{Gallery | | {{Gallery |
| | |width=360 | | |width=360 |
| Line 108: |
Line 111: |
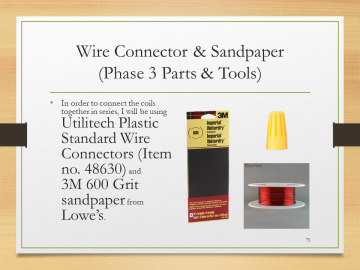
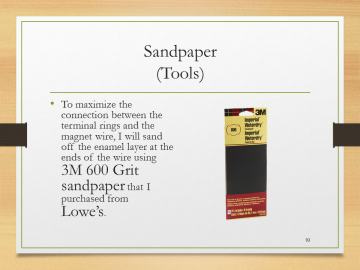
| | |Let's Build the S.H.O. Drive! - Slide 075 of 176.png||'''Wire Connector & Sandpaper'''<br>''(Phase 3 Parts & Tools)''<br>• In order to connect the coils together in series, I will be using Utilitech Plastic Standard Wire Connectors (Item no. 48630) and 3M 600 Grit sandpaper from Lowe’s. | | |Let's Build the S.H.O. Drive! - Slide 075 of 176.png||'''Wire Connector & Sandpaper'''<br>''(Phase 3 Parts & Tools)''<br>• In order to connect the coils together in series, I will be using Utilitech Plastic Standard Wire Connectors (Item no. 48630) and 3M 600 Grit sandpaper from Lowe’s. |
| | }} | | }} |
| | + | [[#toctitle|Click here if you need to jump back to the table of contents!]] |
| | <div style="clear:both"></div> | | <div style="clear:both"></div> |
| − | ==Phase 4== | + | ==Phase 4: No hidden batteries, increase rigidity, hex nuts, ring connectors, toggle switch, fan blades, and extended test run== |
| | {{Gallery | | {{Gallery |
| | |width=360 | | |width=360 |
| Line 173: |
Line 177: |
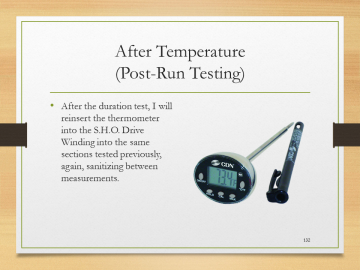
| | |Let's Build the S.H.O. Drive! - Slide 132 of 176.png||'''After Temperature'''<br>''(Post-Run Testing)''<br>• After the duration test, I will reinsert the thermometer into the S.H.O. Drive Winding into the same sections tested previously, again, sanitizing between measurements. | | |Let's Build the S.H.O. Drive! - Slide 132 of 176.png||'''After Temperature'''<br>''(Post-Run Testing)''<br>• After the duration test, I will reinsert the thermometer into the S.H.O. Drive Winding into the same sections tested previously, again, sanitizing between measurements. |
| | }} | | }} |
| | + | [[#toctitle|Click here if you need to jump back to the table of contents!]] |
| | <div style="clear:both"></div> | | <div style="clear:both"></div> |
| − | ==Phase 5== | + | ==Phase 5: Heavy duty basket, S.H.O. Drive insertion, secure meters, and portable test run== |
| | {{Gallery | | {{Gallery |
| | |width=360 | | |width=360 |
| Line 193: |
Line 198: |
| | |Let's Build the S.H.O. Drive! - Slide 144 of 176.png||'''Multi-hour Test'''<br>''(Testing)''<br>• The following will be tested:<br>• Resistance<br>• Inductance [ f(position) ]<br>• R.M.S. Voltage [ f(r.p.m.) ]<br>• Rotational Speed<br>• R.M.S. Current<br>• Temperature [ +references ]<br>• Refer to procedure laid out in Phase 4. | | |Let's Build the S.H.O. Drive! - Slide 144 of 176.png||'''Multi-hour Test'''<br>''(Testing)''<br>• The following will be tested:<br>• Resistance<br>• Inductance [ f(position) ]<br>• R.M.S. Voltage [ f(r.p.m.) ]<br>• Rotational Speed<br>• R.M.S. Current<br>• Temperature [ +references ]<br>• Refer to procedure laid out in Phase 4. |
| | }} | | }} |
| | + | [[#toctitle|Click here if you need to jump back to the table of contents!]] |
| | <div style="clear:both"></div> | | <div style="clear:both"></div> |
| | | | |
| − | ==Phase 6== | + | ==Phase 6: Square tote, plastic spools, protective edge trim, and enclosed duration test run== |
| | {{Gallery | | {{Gallery |
| | |width=360 | | |width=360 |
| Line 210: |
Line 216: |
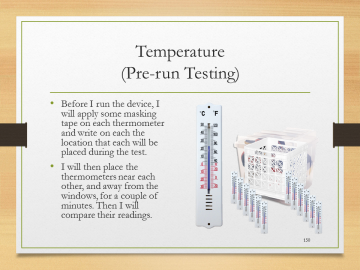
| | |Let's Build the S.H.O. Drive! - Slide 152 of 176.png||'''Temperature'''<br>''(Post-run Testing)''<br>• After the test run, these thermometers will be brought together once again away from the windows to show again for a couple of minutes to see if they give the same reading. | | |Let's Build the S.H.O. Drive! - Slide 152 of 176.png||'''Temperature'''<br>''(Post-run Testing)''<br>• After the test run, these thermometers will be brought together once again away from the windows to show again for a couple of minutes to see if they give the same reading. |
| | }} | | }} |
| | + | [[#toctitle|Click here if you need to jump back to the table of contents!]] |
| | <div style="clear:both"></div> | | <div style="clear:both"></div> |
| | | | |
| − | ==Phase 7== | + | ==Phase 7: Prepare elevated test platform, outdoor test setup, camcorder hookup to portable power, and extended outdoor test run== |
| | {{Gallery | | {{Gallery |
| | |width=360 | | |width=360 |
| Line 243: |
Line 250: |
| | |Let's Build the S.H.O. Drive! - Slide 176 of 176.png||'''Multi-hour Test'''<br>''(Testing)''<br>• The following will be tested:<br>• Resistance<br>• Inductance [ f(position) ]<br>• R.M.S. Voltage [ f(r.p.m.) ]<br>• Rotational Speed<br>• R.M.S. Current<br>• Temperature [ +references ]<br>• Refer to procedure laid out in Phase 4. | | |Let's Build the S.H.O. Drive! - Slide 176 of 176.png||'''Multi-hour Test'''<br>''(Testing)''<br>• The following will be tested:<br>• Resistance<br>• Inductance [ f(position) ]<br>• R.M.S. Voltage [ f(r.p.m.) ]<br>• Rotational Speed<br>• R.M.S. Current<br>• Temperature [ +references ]<br>• Refer to procedure laid out in Phase 4. |
| | }} | | }} |
| | + | [[#toctitle|Click here if you need to jump back to the table of contents!]] |
| | <div style="clear:both"></div> | | <div style="clear:both"></div> |
| | </center> | | </center> |
















![Multi-hour Test(Testing)• The following will be tested:• Resistance• Inductance [ f(position) ]• R.M.S. Voltage [ f(r.p.m.) ]• Rotational Speed• R.M.S. Current• Temperature [ +references ]• Refer to procedure laid out in Phase 4.](/images/thumb/Let%27s_Build_the_S.H.O._Drive%21_-_Slide_144_of_176.png/360px-Let%27s_Build_the_S.H.O._Drive%21_-_Slide_144_of_176.png)



![Multi-hour Test(Testing)• The following will be tested:• Resistance• Inductance [ f(position) ]• R.M.S. Voltage [ f(r.p.m.) ]• Rotational Speed• R.M.S. Current• Temperature [ +references ]• Refer to procedure laid out in Phase 4.](/images/thumb/Let%27s_Build_the_S.H.O._Drive%21_-_Slide_176_of_176.png/360px-Let%27s_Build_the_S.H.O._Drive%21_-_Slide_176_of_176.png)
